Open topic with navigation
Work with Mapped Listings
Use the Map action - from List or View - to see the results of your search as a fixed set of markers on a map. You can zoom and move the map as needed, mouse over a marker for pop-up details, and switch the map view from Road to Aerial (or Birds-Eye, when available).
How . . .
To See Mapped Results from a List Page
To See Mapped Results from Detail View
To Understand Markers
To Move the Map Frame
To Zoom In and Out
To Change Map Views
To View the Listing Details Pop-up
To Open and Close the Results List
To Shrink or Expand the Results List
To Navigate the Results List Below the Map
To Switch to a Full Map Search Using the Dynamic Criteria Panel
To Change Criteria Instantly at the Dynamic Criteria Panel
To Return to the Criteria Page
To Draw a Radius
To Draw a Polygon
To Save a Shape
To Clear a Shape
To Use a Saved Shape
To Display Places (POI)
To Display Locations and Use Defaults
To Get Driving Directions
To Save a Map Search
To See Mapped Results from a List Page
Unlike results from a New search, the system does not limit Map to a display of selected results. When you view search results at Map, all listings display, not just those that are selected at List.
- At any search results List - including My Lists - select the listings you want to view on a map, or select none if you want to view all at map.
- Click Map on the action bar. The mapped listings display.
Note:
- If the system can't display a particular listing at Map, that listing is flagged (!) in the List below the map.
To See Mapped Results from Detail View
- At View in one-per-page format, click Map on the action bar. Only the currently displayed listing displays on the map.
- At View in multiple-per-page format, click Map on the action bar. All listings display on the map.
To Understand Markers
Mapped listings display as markers on the map. They are numbered to match listings displayed in the search results list below the map.
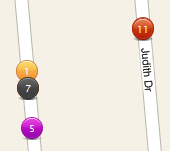
Listing markers are assigned colors according to their status. To view the color legend, click Legend at the Map control.
To Move the Map Frame
- At the Map Search page, drag the map or use the map control.
Hold down the left mouse button and drag the map in the desired direction; or
Click a direction arrow 
To Zoom In and Out
To zoom in for a closer view:
- Click zoom in
 ; or
; or
- Roll the mouse wheel forward; or
- Double click the map
To zoom out for a broader view:
- Click zoom out
 ; or
; or
- Roll the mouse wheel backward
Note:
- The current zoom level displays in the lower right corner of the map. Beyond a distance your MLS specifies, searching is suspended, and you must zoom in to search the map.
To Change Map Views
Use the map control in the top left corner. Click one of the following to change the map view:
- Road: Street Map
- Aerial: Satellite photos
- Birds Eye: Aerial photos from four angles, not available at all locations
To View the Listing Details Pop-up
- To display a detail pop-up, hover the mouse pointer over the map marker.
- To select a property, click the pop-up checkbox.
- To view the property at the Detail View page, click the ML#.
-
 To page through each available photo in a pop-up, use the previous and next buttons. To display the photos n the Photo dialog box click any one of the pictures.
To Open and Close the Results List
The results list opens automatically below the map.
- To close the list, click the
 Close Map List arrow.
- To open the list, click the
 Open Map List arrow.
To Shrink or Expand the Results List
- Mouse over the divider line between the map and list panels.
- Wait for the cursor to change to a double arrow icon.
- To show more of the map, drag the divider line down; to show more of the list, drag the divider line up.
To Navigate the Results List Below the Map
 The page counter shows the number of results and pages, including the current page's number.
 The navigation buttons allow you to navigate through each page. From left to right, the buttons represent First, Previous, Next, and Last.
 The Page Size dropdown list allows you to set the number of rows displayed on a page: 20, 50, and 100. To view all results on a single, scrolling page, choose All. Unless you change it, your Page Size selection remains in effect throughout your current session.
On Map pages, the Close Map List button allows you to hide the results list in order to view a larger portion of the map. Alternatively, drag the divider between the map and list lower to see a larger map and smaller portion of the list.
On Map pages, the Open Map List button restores the results list to the default height - or to a height you set by dragging the divider.
Notes:
- In Map Search mode, any change in the size of the map frame causes a re-run of the search
- In Map Search mode, results do not include archived listings
To Switch to a Full Map Search Using the Dynamic Criteria Panel
Once you switch to a full map search, the current map frame becomes the location, and can be moved.
- To open the dynamic criteria panel, click
 the white downward arrow at the far right of the title bar .
- Select the Map Search checkbox to switch from a fixed set of markers to a full map search.
Note:
- Beyond a zoom limit set by the MLS, searching is suspended, and you must zoom in to search the map.
To Change Criteria Instantly at the Dynamic Criteria Panel
-
To open the dynamic criteria panel, if it is not already open on the right side of the page, click the white downward arrow at the far right of the title bar.
- Choose or type criteria at any field, or add a field at the Other Fields dropdown list.
To draw a location using radius and polygon shapes, make sure the Map Search checkbox at the top of the panel is selected. With Map Search selected, the location fields Town, Zip, Zone, County, and ML# are unavailable.
-
 To close the dynamic criteria panel, click the white upward arrow at the top of the open Panel .
To Return to the Criteria Page
- Click Revise Criteria on the title bar.
To Draw a Radius
- Click Radius on the action bar.
- Move the mouse pointer to the center point of the circle, then click to set the point.
- Move the mouse to draw a line to the outside edge of the radius. The size of the radius increases as you move the mouse.
- When the circle is the desired size, click the mouse to finish the circle.
To Draw a Polygon
- Click Polygon on the action bar.
- Move the mouse pointer to the desired first point, then click to set the point.
- Move the mouse to draw a line to the next location, then click to set the point.
- Click at additional points as necessary.
- To close the polygon, double-click the mouse.
To Save a Shape
- At the Map page, after drawing a shape, click Save Shape at the action bar.
- At the Save Shape dialog box, enter a name for the shape, then click Save.
To Clear a Shape
- At the Map page, click Clear Shape on the action bar.
To Use a Saved Shape
- At the Map page, click the down arrow to open the Use Saved Shape dropdown list, available on the action bar.
- Choose the desired shape from the dropdown list.
Display Places, Locations, and Directions
To Display Places (POI)
- At the Map page, click Places on the action bar.
- At the Show Places dialog box, click one or more Place categories or enter a category not on the list.
- To deselect a place category, click Places on the action bar, and at the dialog box clear checkboxes for the categories you don't want.
- To clear all the categories from the map, click Clear All.
To Display Locations and Use Defaults
- At the Map page, click Location on the action bar.
- At the Locations dialog box, choose the task you want.
- To find a location: At the Find a Location text box, enter the you want to locate on the map, then click Find. The dialog box closes and the location is marked with a blue pushpin. To add more than one pushpin to the map, repeat these steps.
- To display details of the location: mouse over a pushpin to view its pop-up.
- To select one or more saved locations: At the Saved Locations list, click checkboxes to select saved locations to be used for a task.
- To set your default map location: At the Saved Locations list, choose a saved location and click Set as Default.
- To go to your default map location: Click Go to Default.
- To save the current location: After finding a location, click Save Current As. Enter a name, then click Save.
- To delete a saved location: At the Saved Locations list, use checkboxes to select one or more locations for deletion, then click Delete.
To Get Driving Directions
- At the Map page, select properties in the order you want to travel.
- Click Directions on the action bar.
- At the Driving Directions dialog box, you may optionally click the Move Up, Move Down, and Edit buttons to re-order addresses for routing.
- Zoom or move the map as needed.
- To add another address to the list, click Add.
- To customize your route, click Avoid Traffic, Show listings on map, and Round-trip checkboxes as needed. Route displays on the map, followed by distance and driving directions.
To Save a Map Search
- At the Map page, enter shapes and criteria as needed until the properties you want are displayed.
- Click Save Search at the top of the dynamic criteria panel.
Get Documentation in PDF Format
Help for Stratus MLS, v3.18.4 October 22, 2013
Copyright 2013 Stratus Data Systems, Inc.